NGINX Plus 認証・認可の設定
1. mTLS / SSL証明書認証
クライアントから正しい証明書が提示されたことを検証し、接続を許可する設定です

1. mTLS / SSL証明書認証の実施
利用する証明書の作成
まずCAで利用するルート証明書を作成します
cd ~/f5j-nginx-plus-lab2-conf/ssl
openssl ecparam -out ./CA.key -name prime256v1 -genkey
openssl req -new -key ./CA.key -out ./CA-csr.pem -subj '/C=JP/ST=Tokyo/O=EXAMPLE COM/CN=ROOT EXAMPLE COM/emailAddress=admin@example.com'
openssl req -x509 -nodes -days 3650 -key ./CA.key -in ./CA-csr.pem -out ./CA.pem
SSLを終端する際に利用するサーバ証明書を作成します
# cd ~/f5j-nginx-plus-lab2-conf/ssl
openssl ecparam -out ./SERVER.key -name prime256v1 -genkey
openssl req -new -key ./SERVER.key -out ./SERVER-csr.pem -subj '/C=JP/ST=Tokyo/O=EXAMPLE COM/CN=webapp.example.com/emailAddress=admin@example.com'
openssl ca -config ./openssl.cnf -in SERVER-csr.pem -out SERVER.pem
 1Using configuration from ./openssl.cnf
 2Check that the request matches the signature
 3Signature ok
 4Certificate Details:
 5        Serial Number: 1 (0x1)
 6        Validity
 7            Not Before: Sep 26 10:35:40 2022 GMT
 8            Not After : Sep 26 10:35:40 2023 GMT
 9        Subject:
10            countryName               = JP
11            stateOrProvinceName       = Tokyo
12            organizationName          = EXAMPLE COM
13            commonName                = webapp.example.com
14            emailAddress              = admin@example.com
15        X509v3 extensions:
16            X509v3 Basic Constraints:
17                CA:TRUE
18            Netscape Cert Type:
19                SSL Client, SSL Server, SSL CA, S/MIME CA
20            X509v3 Key Usage:
21                Digital Signature, Non Repudiation, Key Encipherment, Certificate Sign, CRL Sign
22            Netscape Comment:
23                OpenSSL Generated Certificate
24            X509v3 Subject Key Identifier:
25                19:66:FD:E6:4F:36:A8:87:42:B7:64:27:FB:7E:95:96:4D:94:14:0A
26            X509v3 Authority Key Identifier:
27                keyid:D0:01:CB:60:EF:22:4C:DB:E4:0F:F1:83:DC:A9:42:43:B8:4D:45:98
28
29Certificate is to be certified until Sep 26 10:35:40 2023 GMT (365 days)
30Sign the certificate? [y/n]:y  << "y" と入力してください
31
32
331 out of 1 certificate requests certified, commit? [y/n]y  << "y" と入力してください
34Write out database with 1 new entries
35Data Base Updated
クライアント証明書認証で利用する証明書で必要となるCSRを作成します
まず1つ目のクライアント証明書を作成します
# cd ~/f5j-nginx-plus-lab2-conf/ssl
openssl ecparam -out ./CLIENT1.key -name prime256v1 -genkey
openssl req -new -key ./CLIENT1.key -out ./CLIENT1-csr.pem -subj '/C=JP/ST=Tokyo/O=EXAMPLE COM/CN=client1.example.com/emailAddress=admin@example.com'
openssl ca -config ./openssl.cnf -in CLIENT1-csr.pem -out CLIENT1.pem
 1Using configuration from ./openssl.cnf
 2Check that the request matches the signature
 3Signature ok
 4Certificate Details:
 5        Serial Number: 2 (0x2)
 6        Validity
 7            Not Before: Sep 26 06:47:31 2022 GMT
 8            Not After : Sep 26 06:47:31 2023 GMT
 9        Subject:
10            countryName               = JP
11            stateOrProvinceName       = Tokyo
12            organizationName          = EXAMPLE COM
13            commonName                = client1.example.com
14            emailAddress              = admin@example.com
15        X509v3 extensions:
16            X509v3 Basic Constraints:
17                CA:FALSE
18            Netscape Comment:
19                OpenSSL Generated Certificate
20            X509v3 Subject Key Identifier:
21                1D:43:87:C8:DE:89:E6:10:5F:27:79:F3:CB:50:A6:32:4F:D4:97:3B
22            X509v3 Authority Key Identifier:
23                keyid:0E:1E:B3:B3:0F:1C:7D:D6:C1:A6:4F:E7:D4:5F:EE:B7:96:72:F3:64
24
25Certificate is to be certified until Sep 26 06:47:31 2023 GMT (365 days)
26Sign the certificate? [y/n]:y  << "y" と入力してください
27
28
291 out of 1 certificate requests certified, commit? [y/n]y  << "y" と入力してください
30Write out database with 1 new entries
31Data Base Updated
次に2つ目のクライアント証明書を作成します
# cd ~/f5j-nginx-plus-lab2-conf/ssl
openssl ecparam -out ./CLIENT2.key -name prime256v1 -genkey
openssl req -new -key ./CLIENT2.key -out ./CLIENT2-csr.pem -subj '/C=JP/ST=Tokyo/O=EXAMPLE COM/CN=client2.example.com/emailAddress=admin@example.com'
openssl ca -config ./openssl.cnf -in CLIENT2-csr.pem -out CLIENT2.pem
 1Using configuration from ./openssl.cnf
 2Check that the request matches the signature
 3Signature ok
 4Certificate Details:
 5        Serial Number: 3 (0x3)
 6        Validity
 7            Not Before: Sep 26 10:37:44 2022 GMT
 8            Not After : Sep 26 10:37:44 2023 GMT
 9        Subject:
10            countryName               = JP
11            stateOrProvinceName       = Tokyo
12            organizationName          = EXAMPLE COM
13            commonName                = client2.example.com
14            emailAddress              = admin@example.com
15        X509v3 extensions:
16            X509v3 Basic Constraints:
17                CA:TRUE
18            Netscape Cert Type:
19                SSL Client, SSL Server, SSL CA, S/MIME CA
20            X509v3 Key Usage:
21                Digital Signature, Non Repudiation, Key Encipherment, Certificate Sign, CRL Sign
22            Netscape Comment:
23                OpenSSL Generated Certificate
24            X509v3 Subject Key Identifier:
25                84:E0:0F:2F:8C:37:62:F8:28:4C:7E:C4:A5:53:FF:19:76:39:B6:6A
26            X509v3 Authority Key Identifier:
27                keyid:D0:01:CB:60:EF:22:4C:DB:E4:0F:F1:83:DC:A9:42:43:B8:4D:45:98
28
29Certificate is to be certified until Sep 26 10:37:44 2023 GMT (365 days)
30Sign the certificate? [y/n]:y  << "y" と入力してください
31
32
331 out of 1 certificate requests certified, commit? [y/n]y  << "y" と入力してください
34Write out database with 1 new entries
35Data Base Updated
index.txt の内容に作成した証明書の情報が記録されていることを確認してください。
cat index.txt
1V       230926103540Z           01      unknown /C=JP/ST=Tokyo/O=EXAMPLE COM/CN=webapp.example.com/emailAddress=admin@example.com
2V       230926103629Z           02      unknown /C=JP/ST=Tokyo/O=EXAMPLE COM/CN=client1.example.com/emailAddress=admin@example.com
3V       230926103744Z           03      unknown /C=JP/ST=Tokyo/O=EXAMPLE COM/CN=client2.example.com/emailAddress=admin@example.com
また参考に以下の情報も確認してください
1$ cat serial
204
3$ ls newcerts/
401.pem  02.pem  03.pem
必要となるファイルをコピーします
# cd ~/f5j-nginx-plus-lab2-conf/ssl
sudo mkdir /etc/nginx/conf.d/ssl
sudo cp SERVER.key /etc/nginx/conf.d/ssl
sudo cp SERVER.pem /etc/nginx/conf.d/ssl
sudo cp CA.pem /etc/nginx/conf.d/ssl
設定
設定内容を確認します
cat ~/f5j-nginx-plus-lab2-conf/lab/mtls1.conf
 1upstream server_group {
 2    zone backend 64k;
 3
 4    server backend1:81;
 5}
 6
 7server {
 8   listen 443 ssl;
 9   ssl_certificate_key conf.d/ssl/SERVER.key;
10   ssl_certificate conf.d/ssl/SERVER.pem;
11
12   ssl_client_certificate conf.d/ssl/CA.pem;
13   ssl_verify_client on;
14
15   location / {
16       proxy_pass http://server_group;
17   }
18}
8-10行目で、SSLを終端する設定とします
12-13行目で、SSL証明書認証を行う設定となります
設定を反映します
sudo cp -r ~/f5j-nginx-plus-lab2-conf/ssl /etc/nginx/conf.d/
sudo cp ~/f5j-nginx-plus-lab2-conf/lab/mtls1.conf /etc/nginx/conf.d/default.conf
sudo nginx -s reload
動作確認
クライアント証明書を提示せず、通信を行います
# cd ~/f5j-nginx-plus-lab2-conf/ssl
curl -v --cacert ./CA.pem https://webapp.example.com --resolve webapp.example.com:443:127.0.0.1
 1* Added webapp.example.com:443:127.0.0.1 to DNS cache
 2* Hostname webapp.example.com was found in DNS cache
 3*   Trying 127.0.0.1:443...
 4* TCP_NODELAY set
 5* Connected to webapp.example.com (127.0.0.1) port 443 (#0)
 6* ALPN, offering h2
 7* ALPN, offering http/1.1
 8* successfully set certificate verify locations:
 9*   CAfile: ./CA.pem
10  CApath: /etc/ssl/certs
11* TLSv1.3 (OUT), TLS handshake, Client hello (1):
12* TLSv1.3 (IN), TLS handshake, Server hello (2):
13* TLSv1.2 (IN), TLS handshake, Certificate (11):
14* TLSv1.2 (IN), TLS handshake, Server key exchange (12):
15* TLSv1.2 (IN), TLS handshake, Request CERT (13):
16* TLSv1.2 (IN), TLS handshake, Server finished (14):
17* TLSv1.2 (OUT), TLS handshake, Certificate (11):
18* TLSv1.2 (OUT), TLS handshake, Client key exchange (16):
19* TLSv1.2 (OUT), TLS change cipher, Change cipher spec (1):
20* TLSv1.2 (OUT), TLS handshake, Finished (20):
21* TLSv1.2 (IN), TLS handshake, Finished (20):
22* SSL connection using TLSv1.2 / ECDHE-ECDSA-AES256-GCM-SHA384
23* ALPN, server accepted to use http/1.1
24* Server certificate:
25*  subject: C=JP; ST=Tokyo; O=EXAMPLE COM; CN=webapp.example.com; emailAddress=admin@example.com
26*  start date: Sep 26 10:58:45 2022 GMT
27*  expire date: Sep 26 10:58:45 2023 GMT
28*  common name: webapp.example.com (matched)
29*  issuer: C=JP; ST=Tokyo; O=EXAMPLE COM; CN=ROOT EXAMPLE COM; emailAddress=admin@example.com
30*  SSL certificate verify ok.
31> GET / HTTP/1.1
32> Host: webapp.example.com
33> User-Agent: curl/7.68.0
34> Accept: */*
35>
36* Mark bundle as not supporting multiuse
37< HTTP/1.1 400 Bad Request
38< Server: nginx/1.21.6
39< Date: Mon, 26 Sep 2022 11:01:38 GMT
40< Content-Type: text/html
41< Content-Length: 237
42< Connection: close
43<
44<html>
45<head><title>400 No required SSL certificate was sent</title></head>
46<body>
47<center><h1>400 Bad Request</h1></center>
48<center>No required SSL certificate was sent</center>
49<hr><center>nginx/1.21.6</center>
50</body>
51</html>
52* Closing connection 0
53* TLSv1.2 (OUT), TLS alert, close notify (256):
37、45、48行目で示す通り、SSL証明書が正しく提示されないためエラーとなっています
次に、1つ目のクライアントを示す証明書を使い通信を行います。
curl -v --cacert ./CA.pem --key ./CLIENT1.key --cert ./CLIENT1.pem https://webapp.example.com --resolve webapp.example.com:443:127.0.0.1
 1* Added webapp.example.com:443:127.0.0.1 to DNS cache
 2* Hostname webapp.example.com was found in DNS cache
 3*   Trying 127.0.0.1:443...
 4* TCP_NODELAY set
 5* Connected to webapp.example.com (127.0.0.1) port 443 (#0)
 6* ALPN, offering h2
 7* ALPN, offering http/1.1
 8* successfully set certificate verify locations:
 9*   CAfile: ./CA.pem
10  CApath: /etc/ssl/certs
11* TLSv1.3 (OUT), TLS handshake, Client hello (1):
12* TLSv1.3 (IN), TLS handshake, Server hello (2):
13* TLSv1.2 (IN), TLS handshake, Certificate (11):
14* TLSv1.2 (IN), TLS handshake, Server key exchange (12):
15* TLSv1.2 (IN), TLS handshake, Request CERT (13):
16* TLSv1.2 (IN), TLS handshake, Server finished (14):
17* TLSv1.2 (OUT), TLS handshake, Certificate (11):
18* TLSv1.2 (OUT), TLS handshake, Client key exchange (16):
19* TLSv1.2 (OUT), TLS handshake, CERT verify (15):
20* TLSv1.2 (OUT), TLS change cipher, Change cipher spec (1):
21* TLSv1.2 (OUT), TLS handshake, Finished (20):
22* TLSv1.2 (IN), TLS handshake, Finished (20):
23* SSL connection using TLSv1.2 / ECDHE-ECDSA-AES256-GCM-SHA384
24* ALPN, server accepted to use http/1.1
25* Server certificate:
26*  subject: C=JP; ST=Tokyo; O=EXAMPLE COM; CN=webapp.example.com; emailAddress=admin@example.com
27*  start date: Sep 26 10:58:45 2022 GMT
28*  expire date: Sep 26 10:58:45 2023 GMT
29*  common name: webapp.example.com (matched)
30*  issuer: C=JP; ST=Tokyo; O=EXAMPLE COM; CN=ROOT EXAMPLE COM; emailAddress=admin@example.com
31*  SSL certificate verify ok.
32> GET / HTTP/1.1
33> Host: webapp.example.com
34> User-Agent: curl/7.68.0
35> Accept: */*
36>
37* Mark bundle as not supporting multiuse
38< HTTP/1.1 200 OK
39< Server: nginx/1.21.6
40< Date: Mon, 26 Sep 2022 11:35:15 GMT
41< Content-Type: application/octet-stream
42< Content-Length: 65
43< Connection: keep-alive
44<
45* Connection #0 to host webapp.example.com left intact
46{ "request_uri": "/","server_addr":"10.1.1.8","server_port":"81"}
38行目で 200 OK が応答されておりエラーなく正しい応答が帰ってきていることが確認できます。
2つ目のクライアントのファイルを利用して動作確認をいただいた場合にも同様の内容が応答されることを確認いただけます。
2. 証明書のRevoke時の動作
証明書のRevoke
2つ目のクライアントの証明書をRevoke(利用を停止)し、その際の動作を確認します
以下コマンドを入力します
# cd ~/f5j-nginx-plus-lab2-conf/ssl
openssl ca -config ./openssl.cnf -gencrl -revoke CLIENT2.pem
 1Using configuration from ./openssl.cnf
 2-----BEGIN X509 CRL-----
 3MIIBCDCBrwIBATAKBggqhkjOPQQDAjBwMQswCQYDVQQGEwJKUDEOMAwGA1UECAwF
 4VG9reW8xFDASBgNVBAoMC0VYQU1QTEUgQ09NMRkwFwYDVQQDDBBST09UIEVYQU1Q
 5TEUgQ09NMSAwHgYJKoZIhvcNAQkBFhFhZG1pbkBleGFtcGxlLmNvbRcNMjIwOTI2
 6MTEwNDA3WhcNMjIxMDI2MTEwNDA3WqAOMAwwCgYDVR0UBAMCAQEwCgYIKoZIzj0E
 7AwIDSAAwRQIgbZViSMalmcHC+W4JP5+78PGTEPTS/DuiXFeMXx4t85wCIQC7c/av
 87L1t/g0B+m1Ls2XwilqS/zJsuMq1NnWJ7SRn9Q==
 9-----END X509 CRL-----
10Revoking Certificate 03.
11Data Base Updated
index.txt の結果を確認してください。Revokeを行った CLIENT2.pem の先頭が R と表示されています
# cd ~/f5j-nginx-plus-lab2-conf/ssl
cat index.txt
1V       230926105845Z           01      unknown /C=JP/ST=Tokyo/O=EXAMPLE COM/CN=webapp.example.com/emailAddress=admin@example.com
2V       230926105859Z           02      unknown /C=JP/ST=Tokyo/O=EXAMPLE COM/CN=client1.example.com/emailAddress=admin@example.com
3R       230926105912Z   220926110407Z   03      unknown /C=JP/ST=Tokyo/O=EXAMPLE COM/CN=client2.example.com/emailAddress=admin@example.com
以下コマンドを実行し、 CRLファイルとして crl.pem を作成します
# cd ~/f5j-nginx-plus-lab2-conf/ssl
openssl ca -config ./openssl.cnf -gencrl -out CRL.pem
1Using configuration from ./openssl.cnf
作成したCRLの情報を表示し、確認します
# cd ~/f5j-nginx-plus-lab2-conf/ssl
openssl crl -inform pem -in CRL.pem -text
 1Certificate Revocation List (CRL):
 2        Version 2 (0x1)
 3        Signature Algorithm: ecdsa-with-SHA256
 4        Issuer: C = JP, ST = Tokyo, O = EXAMPLE COM, CN = ROOT EXAMPLE COM, emailAddress = admin@example.com
 5        Last Update: Sep 26 11:04:16 2022 GMT
 6        Next Update: Oct 26 11:04:16 2022 GMT
 7        CRL extensions:
 8            X509v3 CRL Number:
 9                2
10Revoked Certificates:
11    Serial Number: 03
12        Revocation Date: Sep 26 11:04:07 2022 GMT
13    Signature Algorithm: ecdsa-with-SHA256
14         ** 省略 **
15-----BEGIN X509 CRL-----
16** 省略 **
17-----END X509 CRL-----
10-13行目にRevokeされた証明書の情報が記述されており、 Serial Number 03 が対象となっていることが確認できます
設定
設定内容を確認します
cat ~/f5j-nginx-plus-lab2-conf/lab/mtls2-revoke.conf
 1upstream server_group {
 2    zone backend 64k;
 3
 4    server backend1:81;
 5}
 6
 7server {
 8   listen 443 ssl;
 9   ssl_certificate_key conf.d/ssl/SERVER.key;
10   ssl_certificate conf.d/ssl/SERVER.pem;
11
12   ssl_client_certificate conf.d/ssl/CA.pem;
13   ssl_crl conf.d/ssl/CRL.pem;
14   ssl_verify_client on;
15
16   location / {
17       proxy_pass http://server_group;
18   }
19}
13行目でCRLファイルを参照しています
設定を反映します
# cd ~/f5j-nginx-plus-lab2-conf/ssl
sudo cp CRL.pem /etc/nginx/conf.d/ssl
sudo cp ~/f5j-nginx-plus-lab2-conf/lab/mtls2-revoke.conf /etc/nginx/conf.d/default.conf
sudo nginx -s reload
動作確認
証明書をRevokeしたクライアントの動作を確認します
# cd ~/f5j-nginx-plus-lab2-conf/ssl
curl -v --cacert ./CA.pem --key ./CLIENT2.key --cert ./CLIENT2.pem https://webapp.example.com --resolve webapp.example.com:443:127.0.0.1
 1* Added webapp.example.com:443:127.0.0.1 to DNS cache
 2* Hostname webapp.example.com was found in DNS cache
 3*   Trying 127.0.0.1:443...
 4* TCP_NODELAY set
 5* Connected to webapp.example.com (127.0.0.1) port 443 (#0)
 6* ALPN, offering h2
 7* ALPN, offering http/1.1
 8* successfully set certificate verify locations:
 9*   CAfile: ./CA.pem
10  CApath: /etc/ssl/certs
11* TLSv1.3 (OUT), TLS handshake, Client hello (1):
12* TLSv1.3 (IN), TLS handshake, Server hello (2):
13* TLSv1.2 (IN), TLS handshake, Certificate (11):
14* TLSv1.2 (IN), TLS handshake, Server key exchange (12):
15* TLSv1.2 (IN), TLS handshake, Request CERT (13):
16* TLSv1.2 (IN), TLS handshake, Server finished (14):
17* TLSv1.2 (OUT), TLS handshake, Certificate (11):
18* TLSv1.2 (OUT), TLS handshake, Client key exchange (16):
19* TLSv1.2 (OUT), TLS handshake, CERT verify (15):
20* TLSv1.2 (OUT), TLS change cipher, Change cipher spec (1):
21* TLSv1.2 (OUT), TLS handshake, Finished (20):
22* TLSv1.2 (IN), TLS handshake, Finished (20):
23* SSL connection using TLSv1.2 / ECDHE-ECDSA-AES256-GCM-SHA384
24* ALPN, server accepted to use http/1.1
25* Server certificate:
26*  subject: C=JP; ST=Tokyo; O=EXAMPLE COM; CN=webapp.example.com; emailAddress=admin@example.com
27*  start date: Sep 26 10:58:45 2022 GMT
28*  expire date: Sep 26 10:58:45 2023 GMT
29*  common name: webapp.example.com (matched)
30*  issuer: C=JP; ST=Tokyo; O=EXAMPLE COM; CN=ROOT EXAMPLE COM; emailAddress=admin@example.com
31*  SSL certificate verify ok.
32> GET / HTTP/1.1
33> Host: webapp.example.com
34> User-Agent: curl/7.68.0
35> Accept: */*
36>
37* Mark bundle as not supporting multiuse
38< HTTP/1.1 400 Bad Request
39< Server: nginx/1.21.6
40< Date: Mon, 26 Sep 2022 11:07:13 GMT
41< Content-Type: text/html
42< Content-Length: 215
43< Connection: close
44<
45<html>
46<head><title>400 The SSL certificate error</title></head>
47<body>
48<center><h1>400 Bad Request</h1></center>
49<center>The SSL certificate error</center>
50<hr><center>nginx/1.21.6</center>
51</body>
52</html>
53* Closing connection 0
54* TLSv1.2 (OUT), TLS alert, close notify (256):
38,46,48-49行目で
400 Bad Requestのエラーが表示されていることが確認できます49行目の内容を確認すると、
The SSL certificate errorと表示されていることが確認できます
参考に、Revokeを行っていないクライアントで再度アクセスし、エラーなく結果が表示できることを確認します
curl -v --cacert ./CA.pem --key ./CLIENT1.key --cert ./CLIENT1.pem https://webapp.example.com --resolve webapp.example.com:443:127.0.0.1
 1* Added webapp.example.com:443:127.0.0.1 to DNS cache
 2* Hostname webapp.example.com was found in DNS cache
 3*   Trying 127.0.0.1:443...
 4* TCP_NODELAY set
 5* Connected to webapp.example.com (127.0.0.1) port 443 (#0)
 6* ALPN, offering h2
 7* ALPN, offering http/1.1
 8* successfully set certificate verify locations:
 9*   CAfile: ./CA.pem
10  CApath: /etc/ssl/certs
11* TLSv1.3 (OUT), TLS handshake, Client hello (1):
12* TLSv1.3 (IN), TLS handshake, Server hello (2):
13* TLSv1.2 (IN), TLS handshake, Certificate (11):
14* TLSv1.2 (IN), TLS handshake, Server key exchange (12):
15* TLSv1.2 (IN), TLS handshake, Request CERT (13):
16* TLSv1.2 (IN), TLS handshake, Server finished (14):
17* TLSv1.2 (OUT), TLS handshake, Certificate (11):
18* TLSv1.2 (OUT), TLS handshake, Client key exchange (16):
19* TLSv1.2 (OUT), TLS handshake, CERT verify (15):
20* TLSv1.2 (OUT), TLS change cipher, Change cipher spec (1):
21* TLSv1.2 (OUT), TLS handshake, Finished (20):
22* TLSv1.2 (IN), TLS handshake, Finished (20):
23* SSL connection using TLSv1.2 / ECDHE-ECDSA-AES256-GCM-SHA384
24* ALPN, server accepted to use http/1.1
25* Server certificate:
26*  subject: C=JP; ST=Tokyo; O=EXAMPLE COM; CN=webapp.example.com; emailAddress=admin@example.com
27*  start date: Sep 26 10:58:45 2022 GMT
28*  expire date: Sep 26 10:58:45 2023 GMT
29*  common name: webapp.example.com (matched)
30*  issuer: C=JP; ST=Tokyo; O=EXAMPLE COM; CN=ROOT EXAMPLE COM; emailAddress=admin@example.com
31*  SSL certificate verify ok.
32> GET / HTTP/1.1
33> Host: webapp.example.com
34> User-Agent: curl/7.68.0
35> Accept: */*
36>
37* Mark bundle as not supporting multiuse
38< HTTP/1.1 200 OK
39< Server: nginx/1.21.6
40< Date: Mon, 26 Sep 2022 11:06:50 GMT
41< Content-Type: application/octet-stream
42< Content-Length: 65
43< Connection: keep-alive
44<
45* Connection #0 to host webapp.example.com left intact
46{ "request_uri": "/","server_addr":"10.1.1.8","server_port":"81"}
2. Basic認証
Webサーバなどで用いられるシンプルなユーザ認証であるBasic認証の動作を確認します

設定
設定内容を確認します
cat ~/f5j-nginx-plus-lab2-conf/lab/basicauth.conf
 1upstream server_group {
 2    zone backend 64k;
 3
 4    server backend1:81;
 5}
 6
 7server {
 8   listen 80;
 9   location / {
10       proxy_pass http://server_group;
11   }
12   location /auth {
13       auth_basic           "Administrator’s Area";
14       auth_basic_user_file conf.d/password/htpasswd;
15       proxy_pass http://server_group;
16   }
17}
12行目で、
/authという認証を実施するPATHを作成します13行目で、ベーシック認証を有効にします
14行目で、ユーザの認証情報に利用する htpasswd のファイルを指定します
設定を反映します
sudo cp -r ~/f5j-nginx-plus-lab2-conf/password /etc/nginx/conf.d/
sudo cp ~/f5j-nginx-plus-lab2-conf/lab/basicauth.conf /etc/nginx/conf.d/default.conf
sudo nginx -s reload
動作確認
Curlコマンドで対象のPATHにアクセスします
curl -v -s localhost/auth
 1*   Trying 127.0.0.1:80...
 2* TCP_NODELAY set
 3* Connected to localhost (127.0.0.1) port 80 (#0)
 4> GET /auth HTTP/1.1
 5> Host: localhost
 6> User-Agent: curl/7.68.0
 7> Accept: */*
 8>
 9* Mark bundle as not supporting multiuse
10< HTTP/1.1 401 Unauthorized
11< Server: nginx/1.21.6
12< Date: Mon, 26 Sep 2022 13:27:31 GMT
13< Content-Type: text/html
14< Content-Length: 179
15< Connection: keep-alive
16< WWW-Authenticate: Basic realm="Administrator’s Area"
17<
18<html>
19<head><title>401 Authorization Required</title></head>
20<body>
21<center><h1>401 Authorization Required</h1></center>
22<hr><center>nginx/1.21.6</center>
23</body>
24</html>
25* Connection #0 to host localhost left intact
401 Unauthorizedのエラーが表示されます16行目で、Basic認証が設定されていることが確認できます
httpasswd の内容は以下のユーザ情報を記述しています
User |
Password |
|---|---|
user1 |
user1 |
user2 |
user2 |
user3 |
user3 |
対象のPATHに対して ユーザ名 user1 パスワード user1 を指定し、動作を確認します
curl -v -s -u user1:user1 localhost/auth
 1*   Trying 127.0.0.1:80...
 2* TCP_NODELAY set
 3* Connected to localhost (127.0.0.1) port 80 (#0)
 4* Server auth using Basic with user 'user1'
 5> GET /auth HTTP/1.1
 6> Host: localhost
 7> Authorization: Basic dXNlcjE6dXNlcjE=
 8> User-Agent: curl/7.68.0
 9> Accept: */*
10>
11* Mark bundle as not supporting multiuse
12< HTTP/1.1 200 OK
13< Server: nginx/1.21.6
14< Date: Mon, 26 Sep 2022 13:33:09 GMT
15< Content-Type: application/octet-stream
16< Content-Length: 69
17< Connection: keep-alive
18<
19* Connection #0 to host localhost left intact
20{ "request_uri": "/auth","server_addr":"10.1.1.8","server_port":"81"}
エラーなく正しく表示されていることが確認できます
3. JWTによる通信制御
NGINX Plus は JWT の検証が可能です。またJWT Claimにアクセスし、様々な通信制御を実施することが可能です

1. JWT Validation
利用するJWTを確認
利用するファイルの内容を確認します
JWK(Json Web Key)の内容を確認します
出力結果が以下となります。
cat ~/f5j-nginx-plus-lab2-conf/jwt/api_secret.jwk
1{"keys":
2    [{
3        "k":"ZmFudGFzdGljand0",
4        "kty":"oct",
5        "kid":"0001"
6    }]
7}
各パラメータ内容は以下の通り
Parameter |
意味 |
Link |
|---|---|---|
k |
k (key value) パラメータは, kty octで利用する base64url encodeされたKey文字列をもつ |
|
kty |
kty (key type) パラメータは, RSA や EC といった暗号アルゴリズムファミリーを示す |
|
kid |
kid (key ID) パラメータは特定の鍵を識別するために用いられる |
kty “oct” で利用する Keyの内容をBase64デコードした結果は以下の通り
echo -n "ZmFudGFzdGljand0" | base64 -d
1fantasticjwt
この結果により、このサンプルでは fantasticjwt という文字列がKeyとして使用されていることが確認できます。
今回サンプルリクエストに利用するJWTがこの文字列で署名されたものであるか確認します。
~/f5j-nginx-plus-lab2-conf/jwt/nginx1.jwt の内容を表示します。
HS256 であることを確認します。your-256-bit-secret に先程 jwk の内容をデコードして確認した文字列 fantasticjwt を入力してください。nginx1.jwt の内容を貼り付け、左下の表示が Signature Verified となることを確認してください。
その他、NGINX Plus / JWT に関する詳細は Blog:Authenticating API Clients with JWT and NGINX Plus を参照してください
設定
設定内容を確認します
cat ~/f5j-nginx-plus-lab2-conf/lab/jwt1.conf
 1upstream server_group {
 2    zone backend 64k;
 3
 4    server app-backend1:8080;
 5}
 6
 7server {
 8   listen 80;
 9   location / {
10       proxy_pass http://server_group;
11   }
12   location /auth {
13       auth_jwt "Products API";
14       auth_jwt_key_file conf.d/jwt/api_secret.jwk;
15       proxy_pass http://server_group;
16   }
17}
JWTの動作確認では、HTTPリクエストの情報を応答するサーバを転送先として指定しています。
設定を反映します
sudo cp -r ~/f5j-nginx-plus-lab2-conf/jwt/ /etc/nginx/conf.d/
sudo cp ~/f5j-nginx-plus-lab2-conf/lab/jwt1.conf /etc/nginx/conf.d/default.conf
sudo nginx -s reload
動作確認
PATH /auth に対し、JWTを含まないリクエストを送信し、動作を確認します
curl -v localhost/auth
 1*   Trying 127.0.0.1:80...
 2* TCP_NODELAY set
 3* Connected to localhost (127.0.0.1) port 80 (#0)
 4> GET /auth HTTP/1.1
 5> Host: localhost
 6> User-Agent: curl/7.68.0
 7> Accept: */*
 8>
 9* Mark bundle as not supporting multiuse
10< HTTP/1.1 401 Unauthorized
11< Server: nginx/1.21.6
12< Date: Mon, 26 Sep 2022 14:41:47 GMT
13< Content-Type: text/html
14< Content-Length: 179
15< Connection: keep-alive
16< WWW-Authenticate: Bearer realm="Products API"
17<
18<html>
19<head><title>401 Authorization Required</title></head>
20<body>
21<center><h1>401 Authorization Required</h1></center>
22<hr><center>nginx/1.21.6</center>
23</body>
24</html>
25* Connection #0 to host localhost left intact
401 Authorization Requiredとエラーが表示され、通信が拒否されていることが確認できます
次に正しいJWTを含むリクエストを送り、結果を確認します
curl -v localhost/auth -H "Authorization: Bearer `cat ~/f5j-nginx-plus-lab2-conf/jwt/nginx1.jwt`"
 1*   Trying 127.0.0.1:80...
 2* TCP_NODELAY set
 3* Connected to localhost (127.0.0.1) port 80 (#0)
 4> GET /auth HTTP/1.1
 5> Host: localhost
 6> User-Agent: curl/7.68.0
 7> Accept: */*
 8> Authorization: Bearer eyJ0eXAiOiJKV1QiLCJhbGciOiJIUzI1NiIsImtpZCI6IjAwMDEifQ.eyJpc3MiOiJNeSBJRFAiLCJhdWQiOiJhY2NvdW50Iiwic3ViIjoibmdpbngtcGx1cyIsInNjb3BlIjoicHJvZmlsZSBlbWFpbCIsImVtYWlsX3ZlcmlmaWVkIjpmYWxzZSwibmFtZSI6Im5naW54MSB1c2VyIiwicHJlZmVycmVkX3VzZXJuYW1lIjoibmdpbngxLXVzZXIiLCJnaXZlbl9uYW1lIjoibmdpbngxIiwiZmFtaWx5X25hbWUiOiJ1c2VyIiwiZW1haWwiOiJuZ2lueDFAZXhhbXBsZS5jb20ifQ.sOKct6cXUVpHdbF7s7U46LRXOWxzPZVZPL4hSaLiFoE
 9>
10* Mark bundle as not supporting multiuse
11< HTTP/1.1 200 OK
12< Server: nginx/1.21.6
13< Date: Mon, 26 Sep 2022 14:47:08 GMT
14< Content-Type: application/octet-stream
15< Content-Length: 940
16< Connection: keep-alive
17<
18* Connection #0 to host localhost left intact
19{"request":{"headers":[["Host","server_group"],["Connection","close"],["User-Agent","curl/7.68.0"],["Accept","*/*"],["Authorization","Bearer eyJ0eXAiOiJKV1QiLCJhbGciOiJIUzI1NiIsImtpZCI6IjAwMDEifQ.eyJpc3MiOiJNeSBJRFAiLCJhdWQiOiJhY2NvdW50Iiwic3ViIjoibmdpbngtcGx1cyIsInNjb3BlIjoicHJvZmlsZSBlbWFpbCIsImVtYWlsX3ZlcmlmaWVkIjpmYWxzZSwibmFtZSI6Im5naW54MSB1c2VyIiwicHJlZmVycmVkX3VzZXJuYW1lIjoibmdpbngxLXVzZXIiLCJnaXZlbl9uYW1lIjoibmdpbngxIiwiZmFtaWx5X25hbWUiOiJ1c2VyIiwiZW1haWwiOiJuZ2lueDFAZXhhbXBsZS5jb20ifQ.sOKct6cXUVpHdbF7s7U46LRXOWxzPZVZPL4hSaLiFoE"]],"status":0,"httpversion":"1.0","method":"GET","scheme":"http","uri":"/auth","fullPath":"/auth"},"network":{"clientPort":"51744","clientAddress":"10.1.1.7","serverAddress":"172.19.0.2","serverPort":"8080"},"ssl":{"isHttps":false},"session":{"httpConnection":"close","requestId":"8f8e5fbc233a0d05683f0718f789e23b","connection":"2","connectionNumber":"1"},"environment":{"hostname":"echoapp.net"}}
8行目で、リクエストのAuthorization Headerに、指定した値が含まれていることがわかります
11行目で、
200 OKが応答されており、正しく通信ができたことが確認できます
2. JWTの詳細ログ
JWTは様々な情報をClaimとして保持します。それらの情報を確認します
設定
設定内容を確認します
cat ~/f5j-nginx-plus-lab2-conf/lab/jwt2-detailinfo.conf
 1log_format jwt '$remote_addr - $remote_user [$time_local] "$request" '
 2               '$status $body_bytes_sent "$http_referer" "$http_user_agent" '
 3               '$jwt_header_alg $jwt_claim_sub $jwt_claim_scope $jwt_claim_name $jwt_claim_email';
 4
 5upstream server_group {
 6    zone backend 64k;
 7
 8    server app-backend1:8080;
 9}
10
11server {
12   listen 80;
13   location / {
14       proxy_pass http://server_group;
15   }
16   location /auth {
17       auth_jwt "Products API";
18       auth_jwt_key_file conf.d/jwt/api_secret.jwk;
19
20       proxy_set_header API-Client $jwt_claim_sub;
21       proxy_set_header JWT-alg $jwt_header_alg;
22       proxy_set_header JWT-sub $jwt_claim_sub;
23       proxy_set_header JWT-scope $jwt_claim_scope;
24       proxy_set_header JWT-email $jwt_claim_email;
25
26       access_log /var/log/nginx/access_jwt.log jwt;
27       proxy_pass http://server_group;
28   }
29}
1-3行目で、
log_formatDirective を利用して、LogFormatを記述しています。3行目に$jwt_から始まる変数を指定します26行目で、
access_logDirective を利用してlog_formatで定義したjwtのフォーマットを指定することで、指定のファイルに指定のフォーマットでログを出力します20-24行目で、
proxy_set_headerDirective を利用して バックエンドサーバへ転送するリクエストにJWTの情報をHTTPヘッダーとして付与します
設定を反映します
#sudo cp -r ~/f5j-nginx-plus-lab2-conf/jwt/ /etc/nginx/conf.d/
sudo cp ~/f5j-nginx-plus-lab2-conf/lab/jwt2-detailinfo.conf /etc/nginx/conf.d/default.conf
sudo nginx -s reload
動作確認
2つのJWTを使ってリクエストを送ります。
1回目 nginx1 の応答を確認します
curl -s localhost/auth -H "Authorization: Bearer `cat ~/f5j-nginx-plus-lab2-conf/jwt/nginx1.jwt`" | jq .request.headers
 1[
 2  [
 3    "API-Client",
 4    "nginx-plus"
 5  ],
 6  [
 7    "JWT-alg",
 8    "HS256"
 9  ],
10  [
11    "JWT-sub",
12    "nginx-plus"
13  ],
14  [
15    "JWT-scope",
16    "profile email"
17  ],
18  [
19    "JWT-email",
20    "nginx1@example.com"
21  ],
22  [
23    "Host",
24    "server_group"
25  ],
26  [
27    "Connection",
28    "close"
29  ],
30  [
31    "User-Agent",
32    "curl/7.68.0"
33  ],
34  [
35    "Accept",
36    "*/*"
37  ],
38  [
39    "Authorization",
40    "Bearer eyJ0eXAiOiJKV1QiLCJhbGciOiJIUzI1NiIsImtpZCI6IjAwMDEifQ.eyJpc3MiOiJNeSBJRFAiLCJhdWQiOiJhY2NvdW50Iiwic3ViIjoibmdpbngtcGx1cyIsInNjb3BlIjoicHJvZmlsZSBlbWFpbCIsImVtYWlsX3ZlcmlmaWVkIjpmYWxzZSwibmFtZSI6Im5naW54MSB1c2VyIiwicHJlZmVycmVkX3VzZXJuYW1lIjoibmdpbngxLXVzZXIiLCJnaXZlbl9uYW1lIjoibmdpbngxIiwiZmFtaWx5X25hbWUiOiJ1c2VyIiwiZW1haWwiOiJuZ2lueDFAZXhhbXBsZS5jb20ifQ.sOKct6cXUVpHdbF7s7U46LRXOWxzPZVZPL4hSaLiFoE"
41  ]
42]
設定で付与したHTTPヘッダーの情報が、バックエンドのサーバから応答されていることが確認できます
2回目 nginx2 の応答を確認します
curl -s localhost/auth -H "Authorization: Bearer `cat ~/f5j-nginx-plus-lab2-conf/jwt/nginx2.jwt`" | jq .request.headers
 1[
 2  [
 3    "API-Client",
 4    "nginx-plus"
 5  ],
 6  [
 7    "JWT-alg",
 8    "HS256"
 9  ],
10  [
11    "JWT-sub",
12    "nginx-plus"
13  ],
14  [
15    "JWT-scope",
16    "profile email"
17  ],
18  [
19    "JWT-email",
20    "nginx2@example.com"
21  ],
22  [
23    "Host",
24    "server_group"
25  ],
26  [
27    "Connection",
28    "close"
29  ],
30  [
31    "User-Agent",
32    "curl/7.68.0"
33  ],
34  [
35    "Accept",
36    "*/*"
37  ],
38  [
39    "Authorization",
40    "Bearer eyJ0eXAiOiJKV1QiLCJhbGciOiJIUzI1NiIsImtpZCI6IjAwMDEifQ.eyJpc3MiOiJNeSBJRFAiLCJhdWQiOiJhY2NvdW50Iiwic3ViIjoibmdpbngtcGx1cyIsInNjb3BlIjoicHJvZmlsZSBlbWFpbCIsImVtYWlsX3ZlcmlmaWVkIjpmYWxzZSwibmFtZSI6Im5naW54MiB1c2VyIiwicHJlZmVycmVkX3VzZXJuYW1lIjoibmdpbngyLXVzZXIiLCJnaXZlbl9uYW1lIjoibmdpbngyIiwiZmFtaWx5X25hbWUiOiJ1c2VyIiwiZW1haWwiOiJuZ2lueDJAZXhhbXBsZS5jb20ifQ.CVUH7upnT5n2yzLnlGhNTMKL_Ev6yJfj8FHSFC5v5ME"
41  ]
42]
先程と同様に、正しくHTTPヘッダーが付与されていることが確認できます。
ログを確認します
tail -2 /var/log/nginx/access_jwt.log
1127.0.0.1 - - [27/Sep/2022:00:04:41 +0900] "GET /auth HTTP/1.1" 200 1079 "-" "curl/7.68.0" HS256 nginx-plus profile email nginx1 user nginx1@example.com
2127.0.0.1 - - [27/Sep/2022:00:04:48 +0900] "GET /auth HTTP/1.1" 200 1079 "-" "curl/7.68.0" HS256 nginx-plus profile email nginx2 user nginx2@example.com
nginx1, nginx2 のそれぞれの接続で正しく 200 が応答されており、 JWTの情報がログに記録されていることが確認できます
3. 複雑な制御
JWTに含まれる情報を用いて、通信を制御する動作を確認します
設定
設定内容を確認します
cat ~/f5j-nginx-plus-lab2-conf/lab/jwt3-complicate.conf
 1limit_req_zone $jwt_claim_sub zone=1rpm_per_client:1m rate=1r/m;
 2
 3log_format jwt '$remote_addr - $remote_user [$time_local] "$request" '
 4               '$status $body_bytes_sent "$http_referer" "$http_user_agent" '
 5               '$jwt_claim_scope $jwt_claim_name $jwt_claim_email '
 6               '$jwt_claim_sub $jwt_upstream';
 7
 8map $jwt_claim_scope $jwt_upstream {
 9    ~group1 "slow_group";
10    ~group2 "slow_group";
11    default default_group;
12}
13
14upstream slow_group {
15    zone backend 64k;
16
17    server app-backend1:8080;
18}
19
20upstream default_group {
21    zone backend 64k;
22
23    server app-backend2:8080;
24}
25
26server {
27   listen 80;
28   location / {
29       proxy_pass http://$jwt_upstream;
30   }
31   location /auth {
32       auth_jwt "Products API";
33       auth_jwt_key_file conf.d/jwt/api_secret.jwk;
34       access_log /var/log/nginx/access_jwt.log jwt;
35
36       limit_req zone=1rpm_per_client;
37       proxy_pass http://$jwt_upstream;
38   }
39}
1行目で
$jwt_claim_subをKeyとした、Request Limitを設定し、36行目で、/authのPATHに適用します8-12行目で、
mapDirectiveを使用し、$jwt_claim_scopeに含まれる値に応じて$jwt_upstreamという変数の値を選択するよう記述します。group1 , group2 の場合には、 応答の遅いUpstreamを想定しslow_group、 通常はdefault_groupに転送する動作となります29行目、37行目で転送先を指定しますが、宛先Upstreamの名称に
$jwt_upstreamを指定します
設定を反映します
#sudo cp -r ~/f5j-nginx-plus-lab2-conf/jwt/ /etc/nginx/conf.d/
sudo cp ~/f5j-nginx-plus-lab2-conf/lab/jwt3-complicate.conf /etc/nginx/conf.d/default.conf
sudo nginx -s reload
動作確認
1回目 nginx3.jwt 、 2回目 nginx1.jwt で続けて接続します
curl -s localhost/auth -H "Authorization: Bearer `cat ~/f5j-nginx-plus-lab2-conf/jwt/nginx3.jwt`" | jq .request.headers
 1[
 2  [
 3    "Host",
 4    "slow_group"
 5  ],
 6  [
 7    "Connection",
 8    "close"
 9  ],
10  [
11    "User-Agent",
12    "curl/7.68.0"
13  ],
14  [
15    "Accept",
16    "*/*"
17  ],
18  [
19    "Authorization",
20    "Bearer eyJ0eXAiOiJKV1QiLCJhbGciOiJIUzI1NiIsImtpZCI6IjAwMDEifQ.eyJpc3MiOiJNeSBJRFAiLCJhdWQiOiJhY2NvdW50Iiwic3ViIjoibmdpbngtcGx1cyIsInNjb3BlIjoicHJvZmlsZSBlbWFpbCBncm91cDIiLCJlbWFpbF92ZXJpZmllZCI6ZmFsc2UsIm5hbWUiOiJuZ2lueDMgdXNlciIsInByZWZlcnJlZF91c2VybmFtZSI6Im5naW54My11c2VyIiwiZ2l2ZW5fbmFtZSI6Im5naW54MyIsImZhbWlseV9uYW1lIjoidXNlciIsImVtYWlsIjoibmdpbngzQGV4YW1wbGUuY29tIn0.CGa2fDJFiTJwlNgqW6IdCENu_Re0gkPTaww-glCHckM"
21  ]
22]
curl -s localhost/auth -H "Authorization: Bearer `cat ~/f5j-nginx-plus-lab2-conf/jwt/nginx1.jwt`"
1<html>
2<head><title>503 Service Temporarily Unavailable</title></head>
3<body>
4<center><h1>503 Service Temporarily Unavailable</h1></center>
5<hr><center>nginx/1.21.6</center>
6</body>
7</html>
nginx3.jwt でアクセスした場合、正しく応答が確認できましたnginx1.jwt でアクセスした場合、 503 Service Temporarily Unavailable が応答されていますログを確認します
tail -2 /var/log/nginx/access_jwt.log
1127.0.0.1 - - [27/Sep/2022:09:38:00 +0900] "GET /auth HTTP/1.1" 200 948 "-" "curl/7.68.0" profile email group2 nginx3 user nginx3@example.com nginx-plus slow_group
2127.0.0.1 - - [27/Sep/2022:09:38:07 +0900] "GET /auth HTTP/1.1" 503 197 "-" "curl/7.68.0" profile email nginx1 user nginx1@example.com nginx-plus default_group
JWTを利用した接続ログを確認すると、Curlコマンドの接続結果と同様となっています。
1回目
nginx3を含むリクエストのHTTPレスポンスコードが200、2回目nginx1を含むリクエストのHTTPレスポンスコードが503であることがわかります。1回目の接続は、$jwt_claim_scope
profile email group2、 $jwt_claim_sub がnginx-plus、 $jwt_upstream がslow_groupとなっています2回目の接続は、$jwt_claim_scope
profile email、$jwt_claim_sub がnginx-plus、 $jwt_upstream がdefault_groupとなっています1回目の接続では、$jwt_upstream に
group2が含まれているため、適切に $jwt_upstream がslow_groupとなっています2回目の接続では、$jwt_upstream に
group2が含まれていないため、適切に $jwt_upstream がdefault_groupとなっています1回目と2回目の接続の、 $jwt_claim_sub は双方
nginx-plusとなっています。この値がRateLimitのKeyとなっているため、連続2回の通信で2回めのnginx1がRateLimitで拒否されています
Errorログを確認します
grep 1rpm_per_client /var/log/nginx/error.log
12022/09/27 09:38:07 [error] 1845#1845: *17 limiting requests, excess: 0.886 by zone "1rpm_per_client", client: 127.0.0.1, server: , request: "GET /auth HTTP/1.1", host: "localhost"
2回目の接続が 1rpm_per_client で Request Limit のルールに該当したことがわかります
4. OIDCによる通信制御
Keycloakの設定
Identity Provider として利用する Keycloakの設定を行います
Administration Console を開きます。ログイン画面が表示されますので以下の情報でログインしてください。
ログイン情報
usename |
password |
|---|---|
admin |
admin |

左メニューより Clients を開き、 Create から新規作成を行います。

Client ID: nginx-plus を指定し、 Save します。

SettingsタブのAccess Type: confidential を選択し、Valid Redirect URIs: http://10.1.1.7:80/_codexch を入力し、 Save します。

Credentialsタブを開きます。後ほどSecretの値を利用しますので表示されている文字列を記録しておきます。

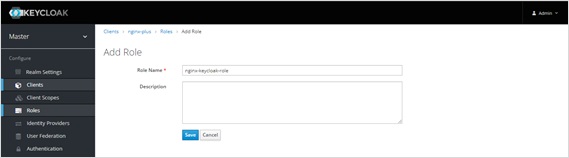
Rolesタブを開き、 Add Role から追加を行います。

Role Name: nginx-keycloak-role を指定し、 Save します。
左メニュー Users を開き、 Add user からユーザの新規作成を行います。
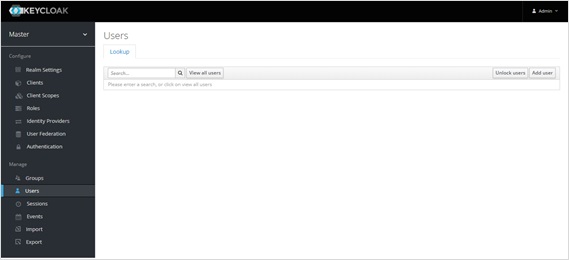
Username: nginx-user を指定し、 Save します。

Credentialsタブを開き、Password: test を入力、Temporary: Off を選択し、nginx-userのパスワードを設定します。

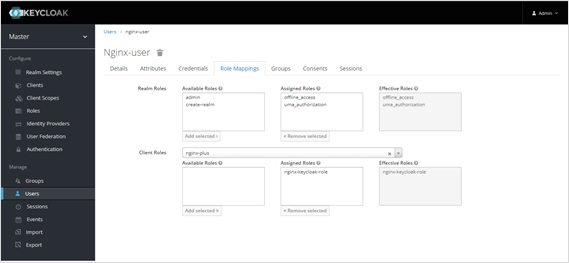
Role Mappingsタブを開き、Client Roles: nginx-plus を選択し、Available Rolesに表示される nginx-keycloak-role を選択し、 Add selected でRoleをAssignします。
これでKeycloakの準備は完了しました。
設定
NGINXの設定を行います
NGINX で OIDCの制御を行うため、NJSモジュールを利用します。 以下コマンドでNJSモジュールをインストールします。
sudo apt install nginx-plus-module-njs
NJSモジュールがインストールされたことを確認します
dpkg -l | grep nginx-plus-module-njs
1ii nginx-plus-module-njs 27+0.7.7-1~focal amd64 NGINX Plus njs dynamic modules
必要となるファイルを取得します。
cd ~/
git clone https://github.com/nginxinc/nginx-openid-connect.git
取得したGitリポジトリに、OIDCに必要となる情報を取得し、ファイルを生成するスクリプトが保存されています。以下コマンドで、Keycloakから必要となる情報を取得します
cd ~/nginx-openid-connect
./configure.sh http://10.1.1.5:8081/auth/realms/master/.well-known/openid-configuration
1configure.sh: NOTICE: Downloading ./idp_jwk.json
2configure.sh: NOTICE: Configuring ./frontend.conf ... no change
3configure.sh: NOTICE: Configuring ./openid_connect_configuration.conf
4configure.sh: NOTICE:  - $oidc_authz_endpoint ... ok
5configure.sh: NOTICE:  - $oidc_token_endpoint ... ok
6configure.sh: NOTICE:  - $oidc_jwt_keyfile ... ok
7configure.sh: NOTICE:  - $oidc_hmac_key ... ok
8configure.sh: NOTICE:  - $oidc_pkce_enable ... ok
9configure.sh: NOTICE: Success - test configuration with 'nginx -t'
生成されるコンフィグの配置イメージ、及び参照は以下のようになります。
このラボでは frontend.conf は別途予め修正した別コンフィグをコピーし default.conf として配置します

NJSモジュールを有効にするため load_modules ディレクティブを nginx.conf に追加します
sudo mv /etc/nginx/nginx.conf /etc/nginx/nginx.conf-bak
cat ~/f5j-nginx-plus-lab2-conf/lab/oidc-loadmodule.conf /etc/nginx/nginx.conf-bak > ~/nginx.conf
sudo cp ~/nginx.conf /etc/nginx/nginx.conf
追加した結果を確認します。正しくNJSモジュールを読み込む設定が記述されていることを確認します
head -3 /etc/nginx/nginx.conf
1# for NJS
2load_module modules/ngx_http_js_module.so;
3load_module modules/ngx_stream_js_module.so;
設定ファイルを一部変更します。 <Client Secret> の情報は先程Keycloakの設定画面で確認した文字列を入力してコマンドを実行してください
sed -i -e 's/my-client-id/nginx-plus/g' ~/nginx-openid-connect/openid_connect_configuration.conf
sed -i -e 's/my-client-secret/<Client Secret>/g' ~/nginx-openid-connect/openid_connect_configuration.conf
設定内容を確認します
cat ~/f5j-nginx-plus-lab2-conf/lab/oidc-front.conf
 1# This is the backend application we are protecting with OpenID Connect
 2upstream my_backend {
 3    zone my_backend 64k;
 4    server backend1:81;
 5}
 6
 7# Custom log format to include the 'sub' claim in the REMOTE_USER field
 8log_format main_jwt '$remote_addr - $jwt_claim_sub [$time_local] "$request" $status '
 9                    '$body_bytes_sent "$http_referer" "$http_user_agent" "$http_x_forwarded_for"';
10
11# The frontend server - reverse proxy with OpenID Connect authentication
12#
13server {
14    include conf.d/openid_connect.server_conf; # Authorization code flow and Relying Party processing
15    error_log /var/log/nginx/error.log debug;  # Reduce severity level as required
16
17    listen 80; # Use SSL/TLS in production
18
19    location / {
20        proxy_hide_header "Content-Type";
21        add_header 'Content-Type' 'text/html';
22
23        # This site is protected with OpenID Connect
24        auth_jwt "" token=$session_jwt;
25        error_page 401 = @do_oidc_flow;
26
27        auth_jwt_key_file $oidc_jwt_keyfile; # Enable when using filename
28        #auth_jwt_key_request /_jwks_uri; # Enable when using URL
29
30        # Successfully authenticated users are proxied to the backend,
31        # with 'sub' claim passed as HTTP header
32        proxy_set_header username $jwt_claim_sub;
33        proxy_pass http://my_backend; # The backend site/app
34
35        access_log /var/log/nginx/access.log main_jwt;
36    }
37}
4行目で、転送先サーバを指定します
ラボ環境で、応答データの
Content-Typeをtext/htmlとするため、20-21行目のように設定します14行目で、OIDCに必要となる各種Pathを指定した別の設定ファイルを読み込みます
24,27行目で、OIDCのフローに従って正しくJWT Tokenを取得したクライアントのアクセスを評価します
必要となるファイルをコピーします。 OIDCのGitHub上にサンプルとなるfrontend.confがありますが、代わりに予め作成した別のコンフィグをコピーします。 設定を反映します
sudo cp ~/nginx-openid-connect/idp_jwk.json /etc/nginx/conf.d/
sudo cp ~/nginx-openid-connect/openid_connect_configuration.conf /etc/nginx/conf.d/
sudo cp ~/nginx-openid-connect/openid_connect.server_conf /etc/nginx/conf.d/
sudo cp ~/nginx-openid-connect/openid_connect.js /etc/nginx/conf.d/
sudo cp ~/f5j-nginx-plus-lab2-conf/lab/oidc-front.conf /etc/nginx/conf.d/default.conf
sudo nginx -s reload
動作確認
Chromeブラウザを開き、 Secret Tab (New Incognito Window) を開いてください。

http://10.1.1.7 へアクセスしてください。
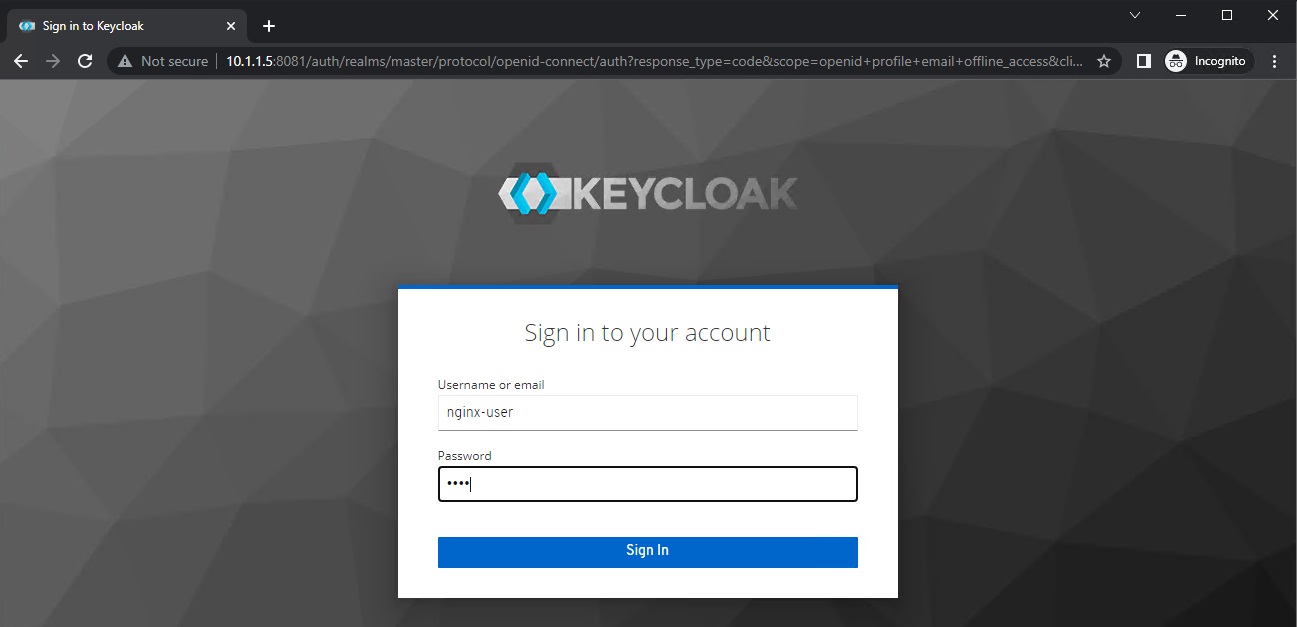
Keycloakのログイン画面が表示されます。先程設定を行った nginx-user でログインしてください。
ログイン情報
usename |
password |
|---|---|
nginx-user |
test |
ログインが正常に行われた場合、Webアプリケーションの結果をブラウザで確認いただけます。

不要ファイル削除
その他項目で不要となるファイルを削除します
sudo mv /etc/nginx/nginx.conf-bak /etc/nginx/nginx.conf
sudo rm /etc/nginx/conf.d/openid_connect_configuration.conf
その他設定に関する補足
IDaaSサービスと連携するなどインターネットを経由してOIDCを利用する場合、SSL/TLSの利用が必要となります。 以下の設定を参考に、適切な認証局に署名された証明書を利用してください
IDaaSサービスで指定するリダイレクトURLとして
https://<FQDN>/_codexchを指定してください以下設定を参考に、 listen directive に
443 sslを指定、ssl_certificate / keyで指定する適切な証明書を配置してください
1server {
2
3    listen 443 ssl;
4
5    server_name <FQDN>;
6    ssl_certificate /etc/letsencrypt/live/<FQDN>/fullchain.pem;
7    ssl_certificate_key /etc/letsencrypt/live/<FQDN>/privkey.pem;
8
9**省略**